> ## Documentation Index
> Fetch the complete documentation index at: https://serval-hannah-docs-custom-access.mintlify.site/llms.txt
> Use this file to discover all available pages before exploring further.
# AWS
## About AWS
Amazon Web Services (AWS) is a public-cloud platform, offering on-demand compute, storage, database, and networking services. Connecting AWS to Serval lets you automate everyday cloud-ops and security workflows—from listing IAM roles to spinning down unused EC2 instances—directly from chat.
## What the AWS integration enables
| Capability | Description |
| -------------------- | ----------------------------------------------------------------- |
| Access Management | Create, update, and manage users and their permissions |
| Automation workflows | Manage resources, create roles, and automate lifecycle management |
***
## AWS configuration (in the AWS console)
Follow these steps to create a cross-account role that Serval can assume. The role's policies determine exactly which AWS APIs Serval can call.
1. **Open the modal in Serval**\
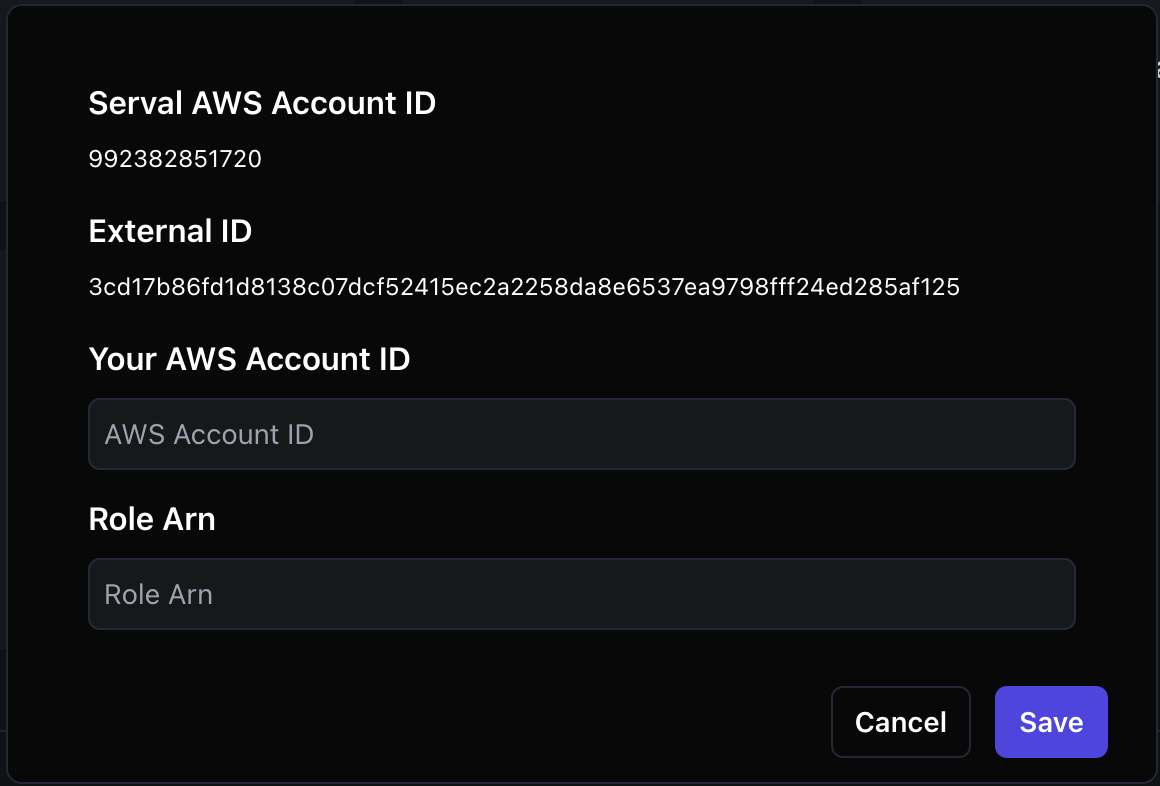
In the Serval UI navigate to **Apps → Connect AWS**. Leave this window open; it shows the **Account ID** and **External ID** you will need shortly.
 2. **Create a new IAM role**\
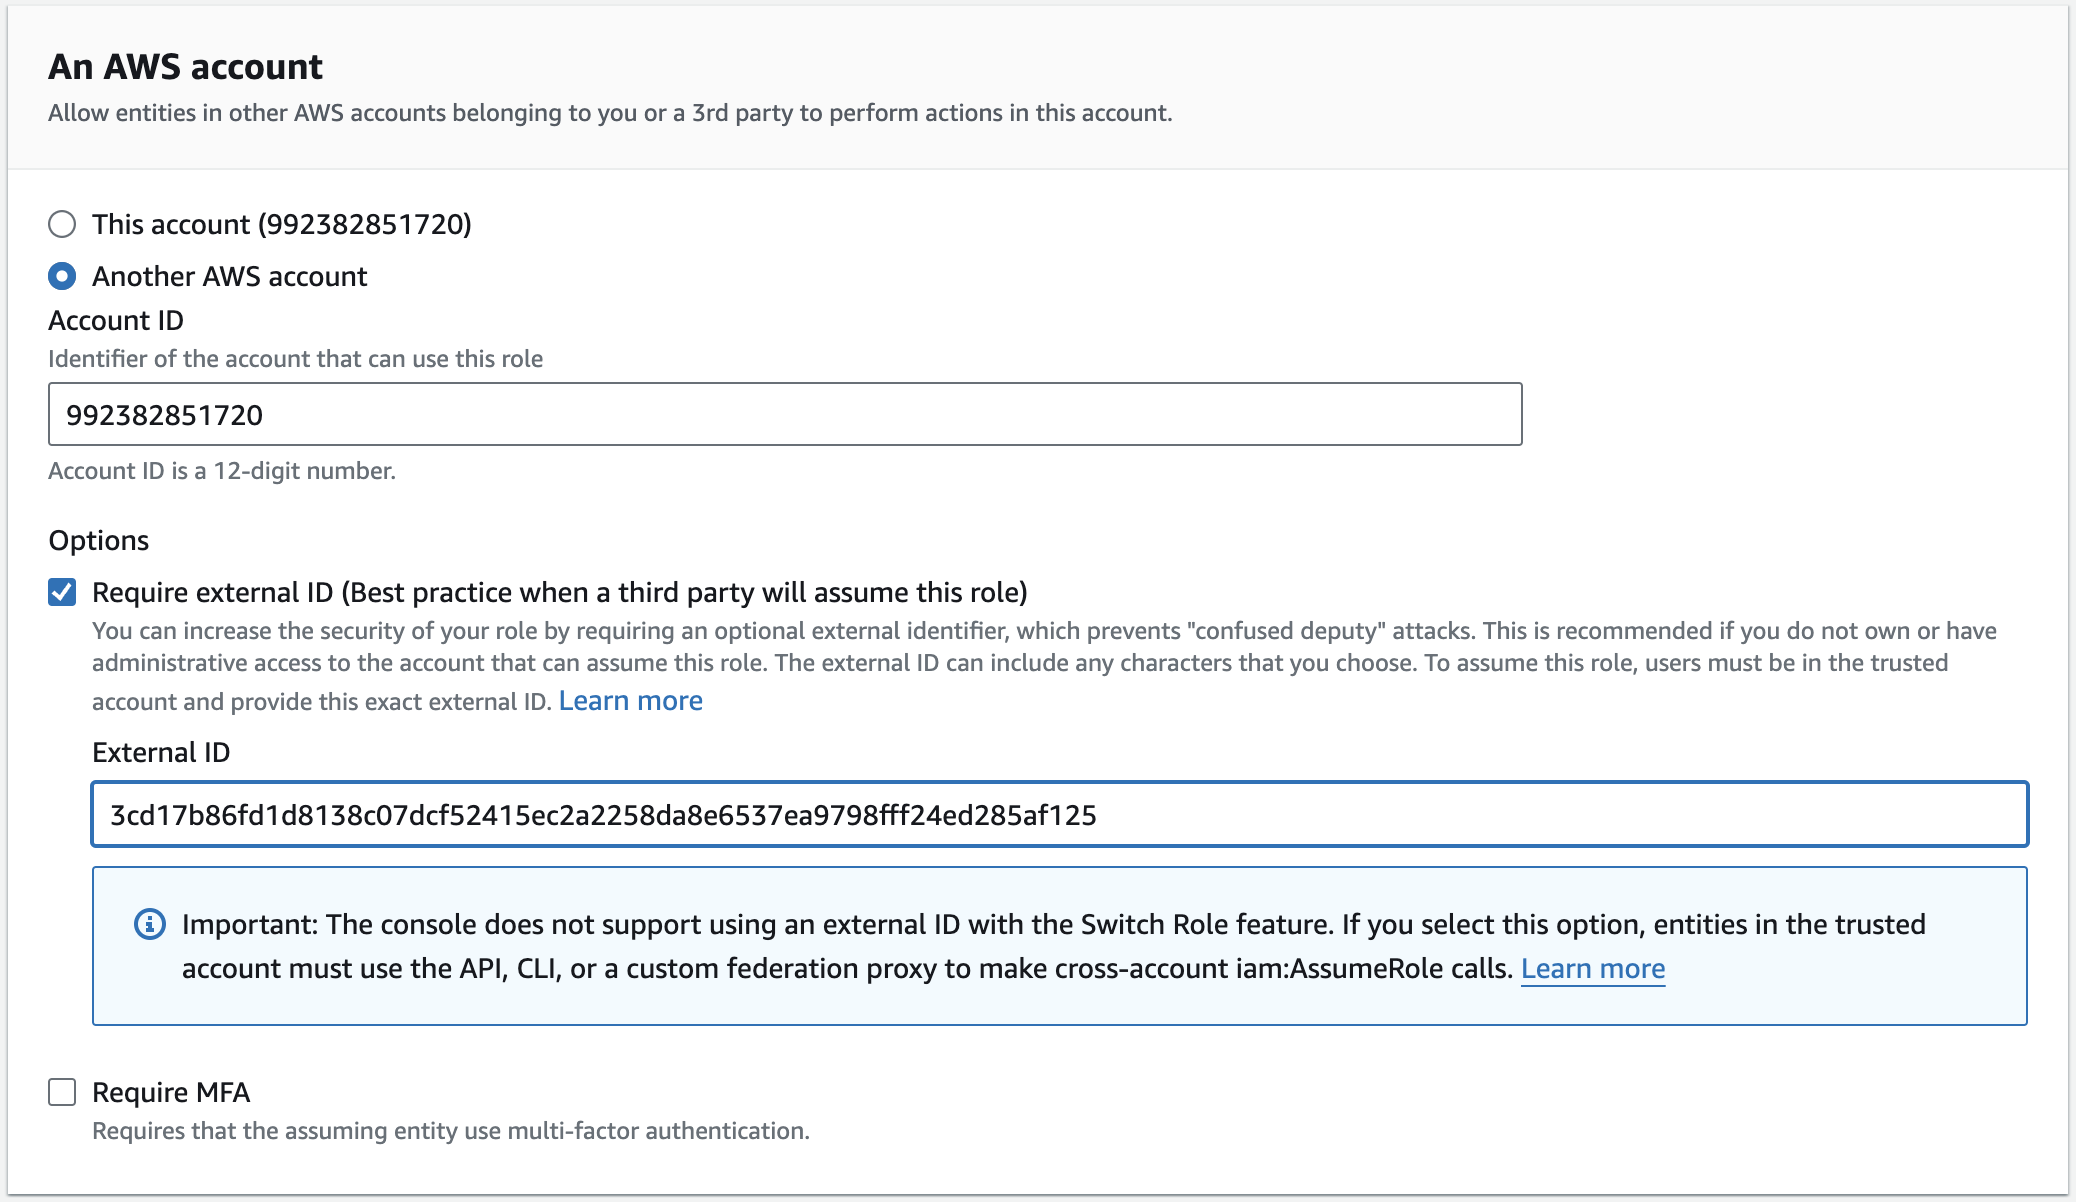
In AWS go to **IAM → Roles → Create role** and choose **Another AWS account** as the trusted entity.\
Enter the **Account ID** shown in Serval, then tick **Require external ID** and paste the **External ID**.
2. **Create a new IAM role**\
In AWS go to **IAM → Roles → Create role** and choose **Another AWS account** as the trusted entity.\
Enter the **Account ID** shown in Serval, then tick **Require external ID** and paste the **External ID**.
.png?fit=max&auto=format&n=GQpN5Xgp7Zumq9UK&q=85&s=2001953fe0cff2fe8f34857cf1b2fb18)
 3. **Attach policies**\
Select AWS-managed or custom policies that grant the actions Serval needs (e.g. `IAMReadOnlyAccess`).\\
3. **Attach policies**\
Select AWS-managed or custom policies that grant the actions Serval needs (e.g. `IAMReadOnlyAccess`).\\
.png?fit=max&auto=format&n=GQpN5Xgp7Zumq9UK&q=85&s=5d866729b559c8009cf9f238b6bc5e9a) 4. **Finish the role wizard** — name the role something memorable and click **Create role**.\\
4. **Finish the role wizard** — name the role something memorable and click **Create role**.\\
.png?fit=max&auto=format&n=GQpN5Xgp7Zumq9UK&q=85&s=b43cdf0a141238e9e79b8d16f26ba53a) 5. **Update the trust policy**\
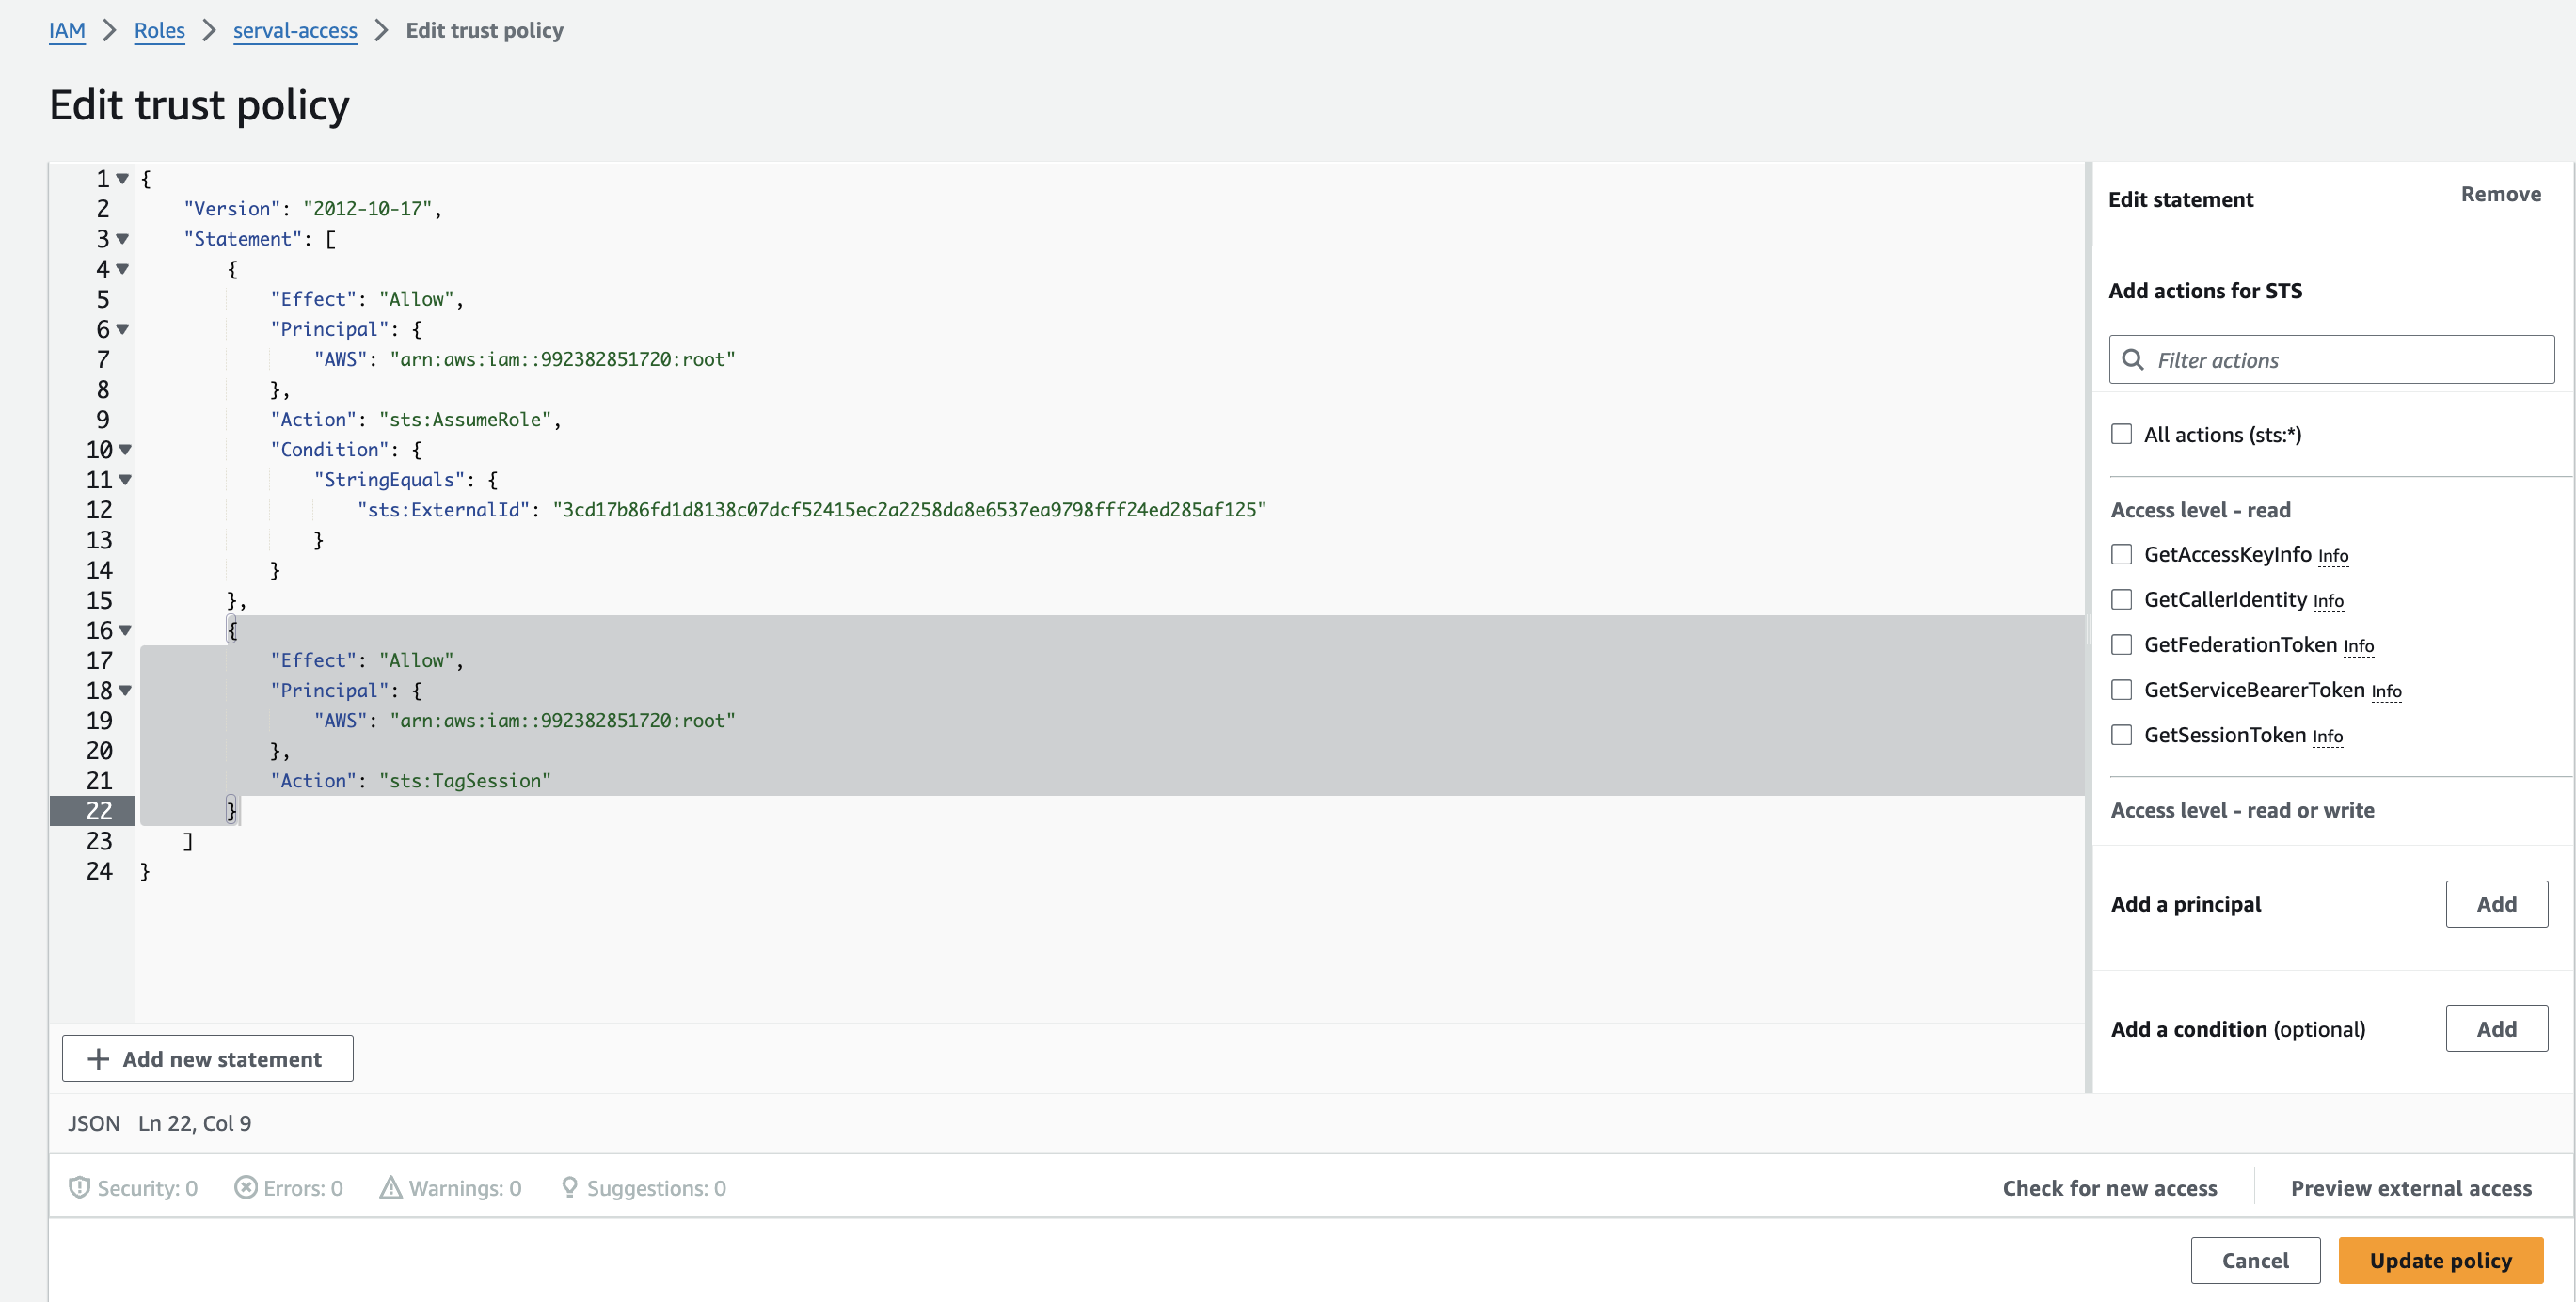
Open the new role → **Trust relationships → Edit trust policy** and replace the document with the version below (adds the required `sts:TagSession` action).\\
5. **Update the trust policy**\
Open the new role → **Trust relationships → Edit trust policy** and replace the document with the version below (adds the required `sts:TagSession` action).\\
.png?fit=max&auto=format&n=GQpN5Xgp7Zumq9UK&q=85&s=950d9d526b79c9a958340f9e48e436b1) ```json theme={null}
{
"Version": "2012-10-17",
"Statement": [
{
"Effect": "Allow",
"Principal": { "AWS": "arn:aws:iam::992382851720:root" },
"Action": "sts:AssumeRole",
"Condition": {
"StringEquals": { "sts:ExternalId": "" }
}
},
{
"Effect": "Allow",
"Principal": { "AWS": "arn:aws:iam::992382851720:root" },
"Action": "sts:TagSession"
}
]
}
```
* Here is an example of the updated policy in the UI.
```json theme={null}
{
"Version": "2012-10-17",
"Statement": [
{
"Effect": "Allow",
"Principal": { "AWS": "arn:aws:iam::992382851720:root" },
"Action": "sts:AssumeRole",
"Condition": {
"StringEquals": { "sts:ExternalId": "" }
}
},
{
"Effect": "Allow",
"Principal": { "AWS": "arn:aws:iam::992382851720:root" },
"Action": "sts:TagSession"
}
]
}
```
* Here is an example of the updated policy in the UI.
 6. **Copy the Role ARN & Account ID** — you will paste these into Serval in the next section.
***
## Serval Configuration
1. Return to the **AWS** connection modal in Serval.
2. Paste the **Role ARN** and **Account ID**, then click **Save**.
Your AWS account is now connected—try running the *List IAM Roles* workflow to verify connectivity.
6. **Copy the Role ARN & Account ID** — you will paste these into Serval in the next section.
***
## Serval Configuration
1. Return to the **AWS** connection modal in Serval.
2. Paste the **Role ARN** and **Account ID**, then click **Save**.
Your AWS account is now connected—try running the *List IAM Roles* workflow to verify connectivity.