> ## Documentation Index
> Fetch the complete documentation index at: https://serval-hannah-docs-custom-access.mintlify.site/llms.txt
> Use this file to discover all available pages before exploring further.
# Jira
## What the Jira integration enables
| Capability | Description |
| -------------------- | ----------------------------------------------------------------------------------------------- |
| Automation workflows | Streamline issue creation, status updates, project management tasks, and user access management |
| Ticket Syncing | Sync tickets between Serval and Jira |
Anything defined in the [Jira REST API](https://developer.atlassian.com/cloud/jira/platform/rest/v3/intro/) can be accessed through Serval.
***
## Jira Configuration
Connecting Jira to Serval is straightforward and requires no manual configuration on the Jira side. The integration uses OAuth to securely connect your Jira instance with Serval.
### Prerequisites
* You must have admin permissions in your Jira instance
* Access to install apps in your Jira workspace
***
## Serval Configuration
1. In Serval go to **Apps → Available → Jira → Connect**
2. Click the **Connect** button to initiate the OAuth flow
3. A new window will open directing you to your Jira instance
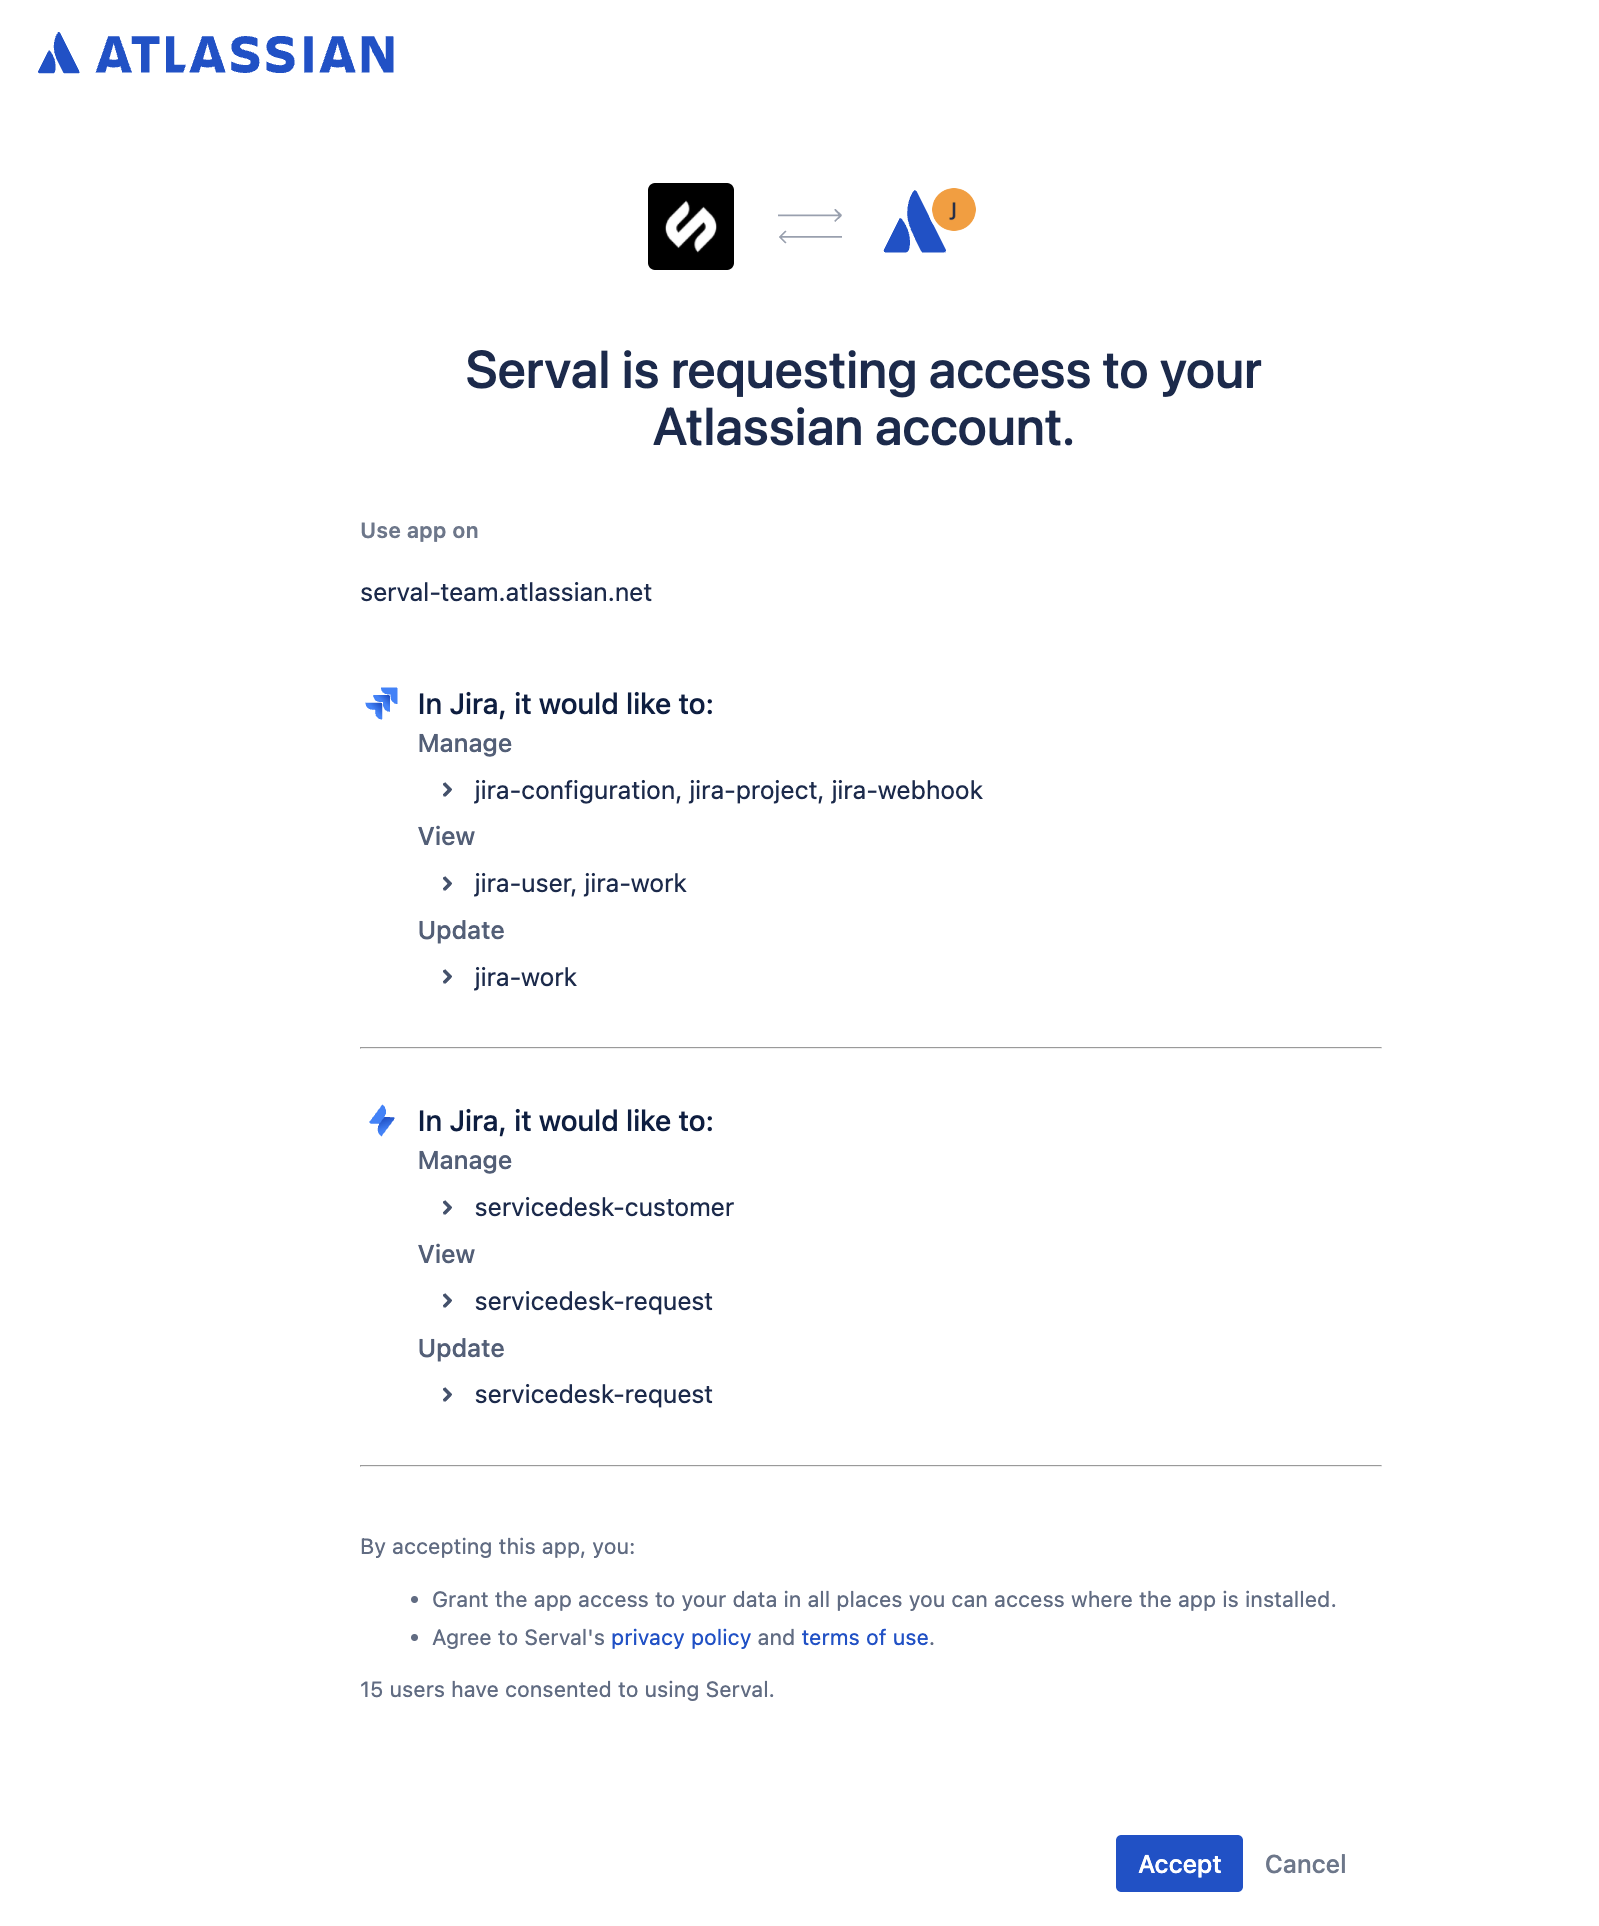 4. Review and accept the integration permissions and scopes
5. Click **Accept** to complete the connection
6. You'll be redirected back to Serval with the integration successfully connected
That's it! No additional configuration is needed. Serval can now access your Jira instance through the authorized OAuth connection.
***
## Additional Notes
### Ticket Syncing
To enable ticket syncing follow these steps:
1. Navigate to `https://admin.atlassian.com/s/[your-instance-id]/user-connected-apps/tab/installed`
2. Click the **Settings** tab
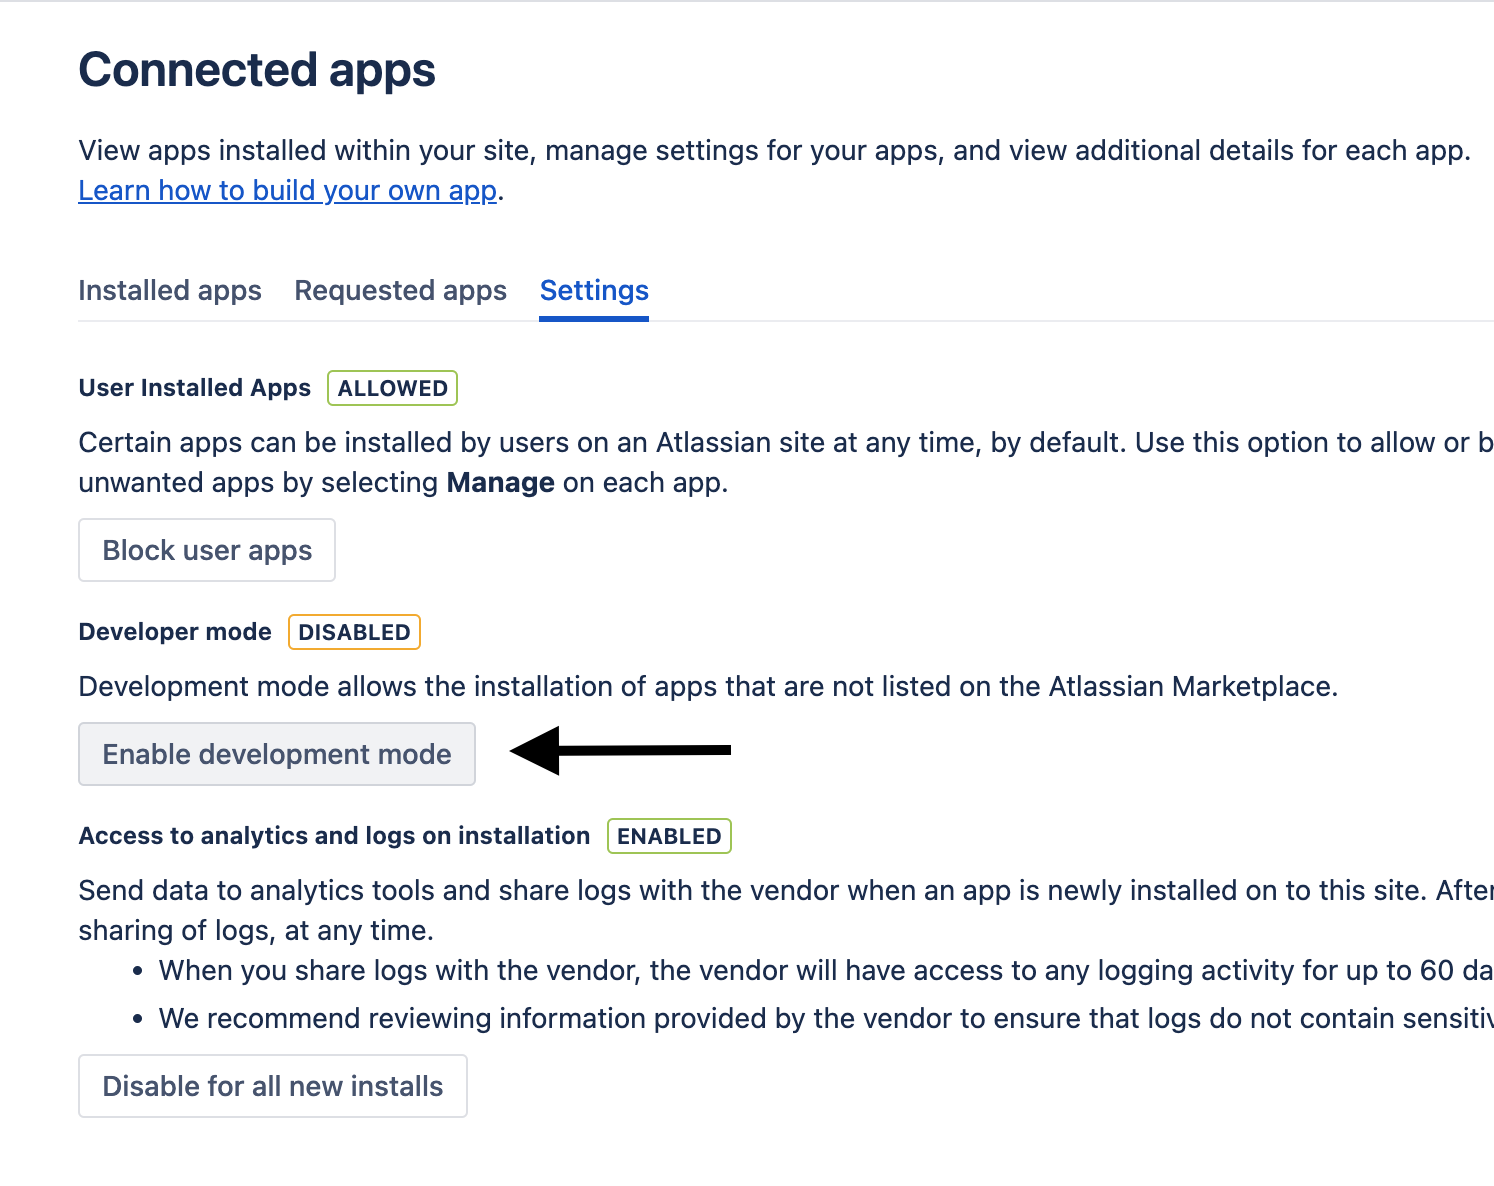
3. Ensure **Enable development mode** is turned on
4. Review and accept the integration permissions and scopes
5. Click **Accept** to complete the connection
6. You'll be redirected back to Serval with the integration successfully connected
That's it! No additional configuration is needed. Serval can now access your Jira instance through the authorized OAuth connection.
***
## Additional Notes
### Ticket Syncing
To enable ticket syncing follow these steps:
1. Navigate to `https://admin.atlassian.com/s/[your-instance-id]/user-connected-apps/tab/installed`
2. Click the **Settings** tab
3. Ensure **Enable development mode** is turned on
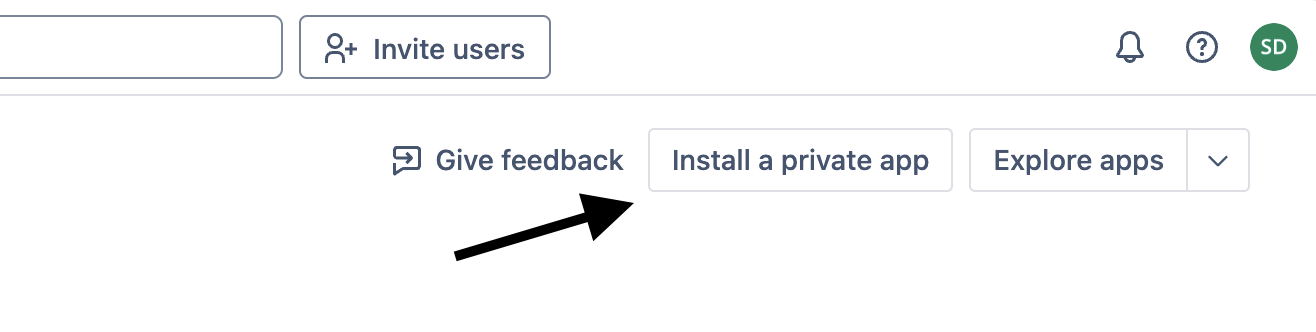
 4. Click **Install private app** button
 5. Enter the following URL: `https://svflow-oauth.api.serval.com/jira-connect/atlassian-connect.json`
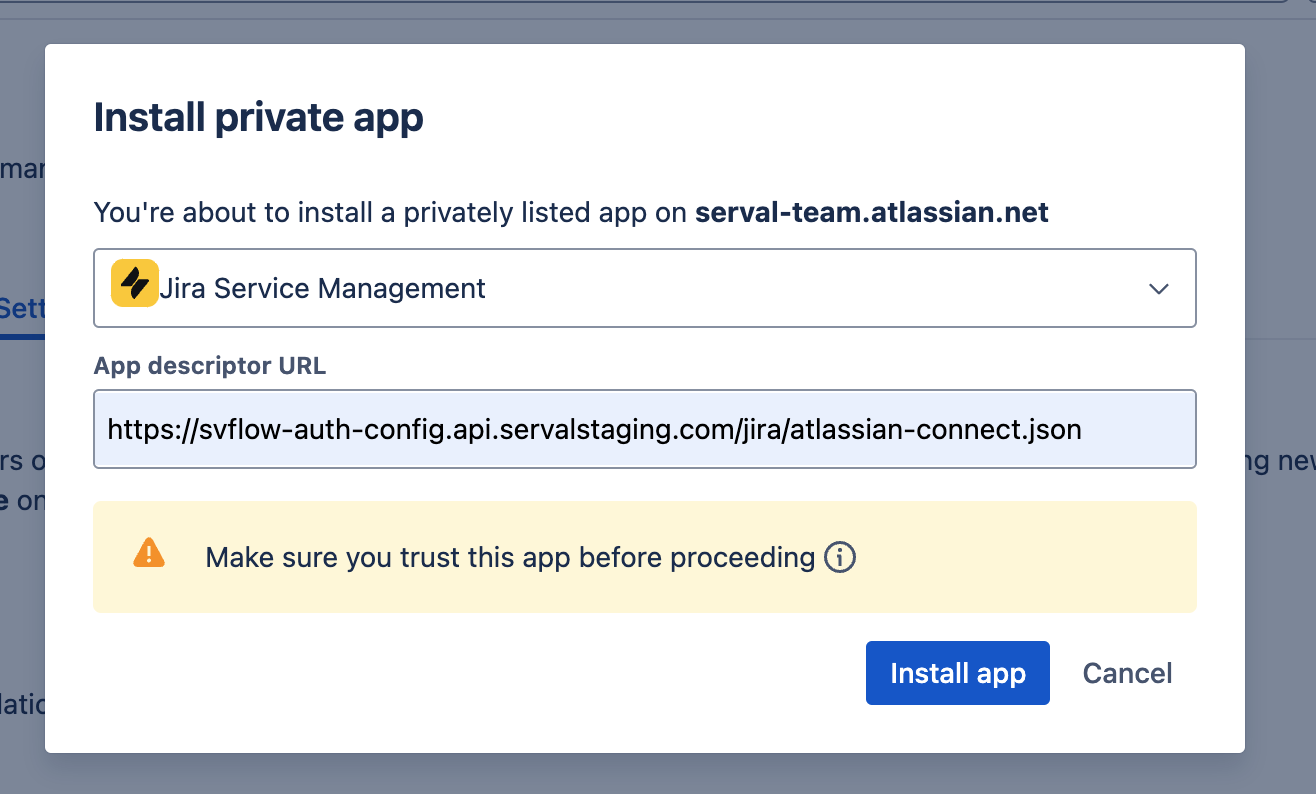 6. Click **Install** to enable enhanced ticket syncing features
***
Need help? Contact **[support@serval.com](mailto:support@serval.com)** for assistance with your Jira integration.
6. Click **Install** to enable enhanced ticket syncing features
***
Need help? Contact **[support@serval.com](mailto:support@serval.com)** for assistance with your Jira integration.