

About Envoy
Envoy is a modern visitor management platform that helps organizations create a welcoming and secure workplace. The Envoy API enables workplace management and visitor invitation workflows.What the Envoy integration enables
Setting up Envoy API Access
This guide will walk you through setting up client API key authentication for Envoy, which is ideal for integrating with Serval.Step 1: Create or identify an authorized API User
Before you can access the Envoy API, you need to set up a dedicated API user account:- Navigate to your Envoy employee directory
- Click Add Employee to create a new employee manually
- Fill in the required information for your API user:
- Use a service account email (e.g.,
api-user@yourcompany.com) - Assign a Global Admin role to ensure full API access
- Use a service account email (e.g.,
- Important: Disable the setting “Show employee as a host on the Visitors Kiosk” to prevent the API user from appearing in visitor-facing interfaces
Step 2: Create an Integration in the Dev Dashboard
Next, you’ll need to create an integration to generate your API credentials:- Visit the Envoy Dev Dashboard
- Click Create New to start a new integration
- Configure your integration:
- Name: Provide a descriptive name (e.g., “Serval Integration”)
- Description: Add a brief description of the integration’s purpose
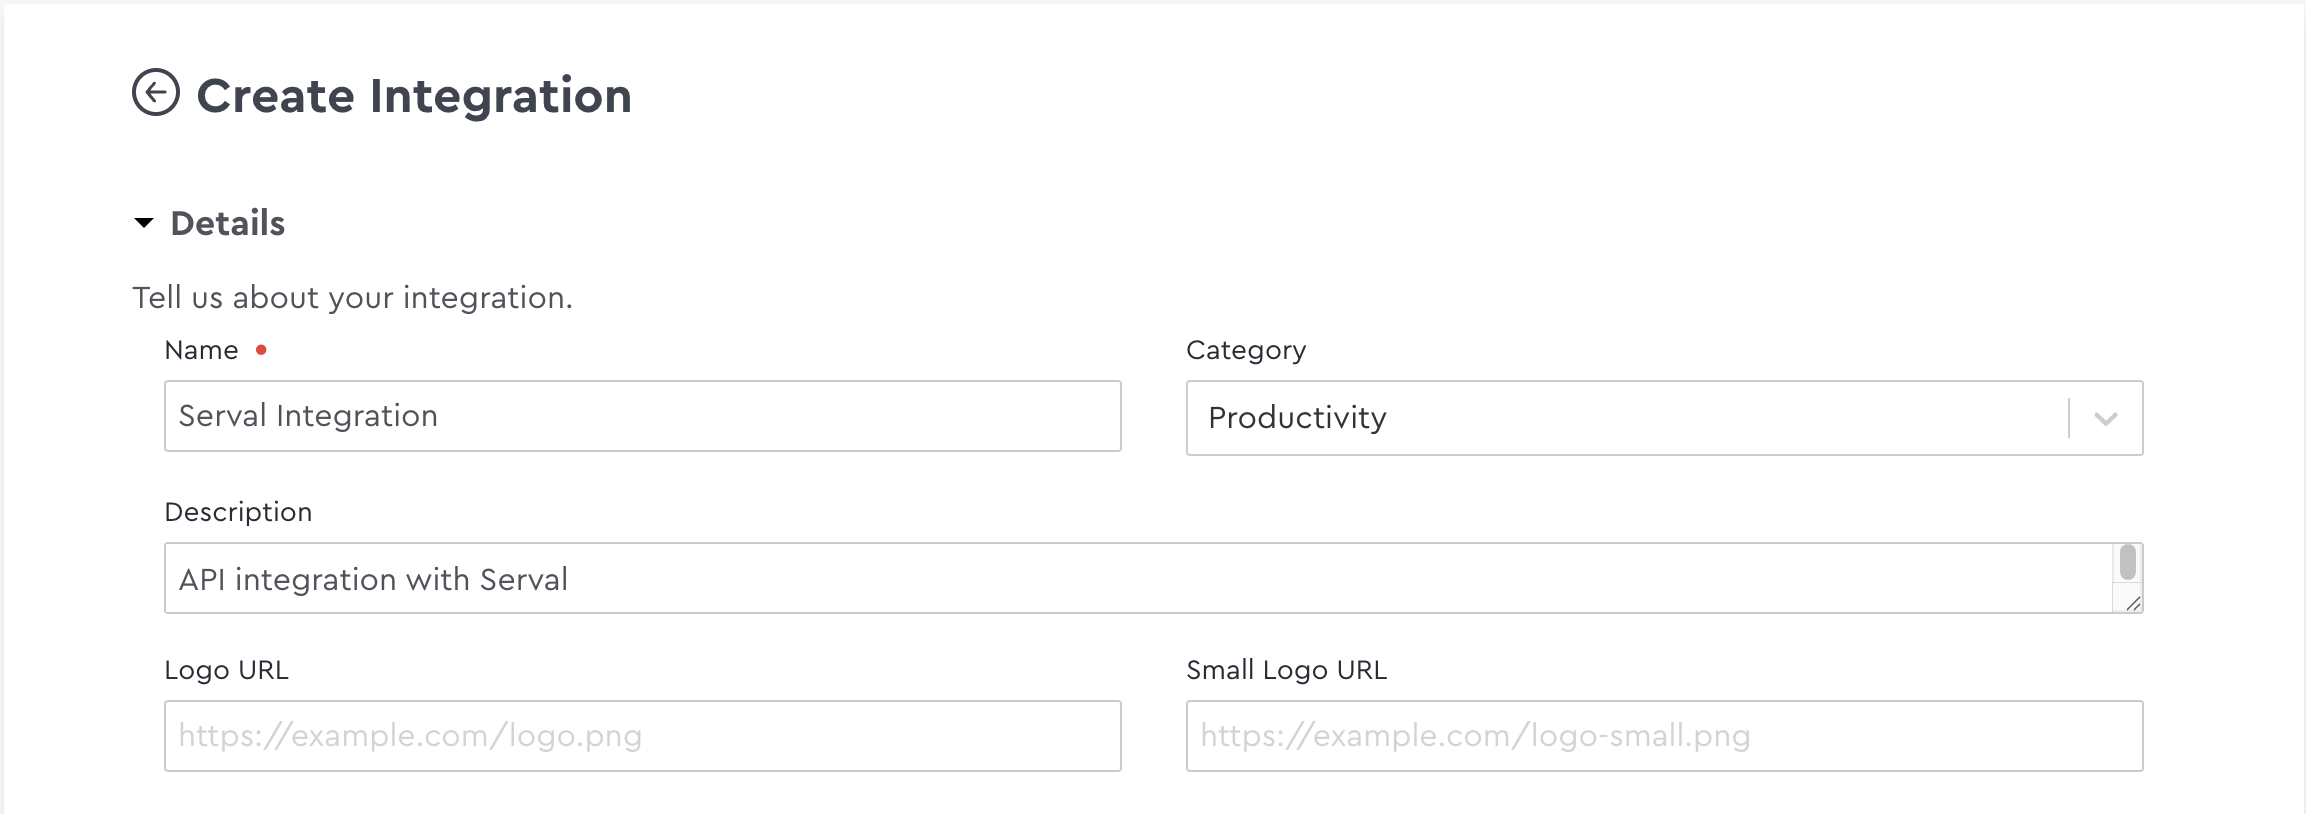
Step 3: Configure API Scopes
Select the appropriate API scopes for your integration based on your needs: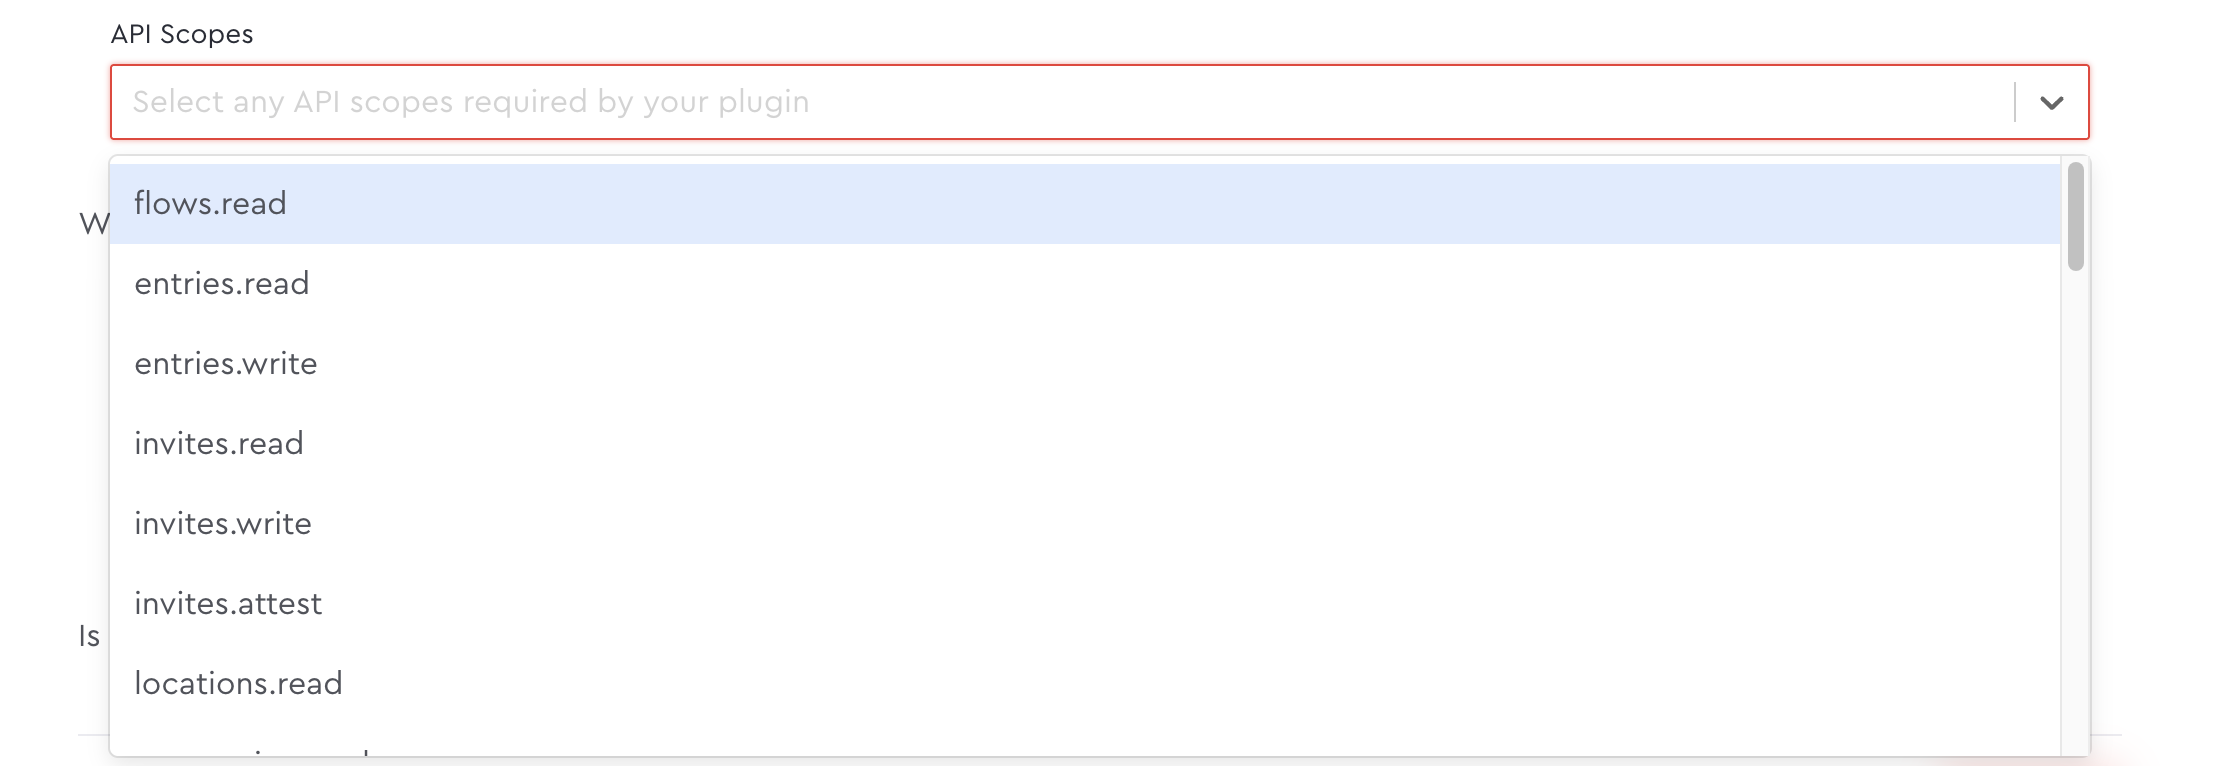
Recommended Scopes
We recommend starting with these core scopes as a foundation for your Envoy integration:These scopes provide comprehensive access to manage visitors, invitations, and workplace data. Add additional scopes only as needed for specific use cases.
Step 4: Enable the Integration
- After selecting your scopes, check the box “Is the integration ready to be displayed?”
- Click Save to create your integration
Step 5: Retrieve Your Client API Key
Once your integration is saved, Envoy will generate a ‘Envoy API Credentials” dropdown below in the same page:- In ‘Envoy API Credentials’ dropdown, locate the Client API Key section
- Copy the API key to your clipboard
- Store this key securely - you’ll need to provide this to Serval to complete the integration
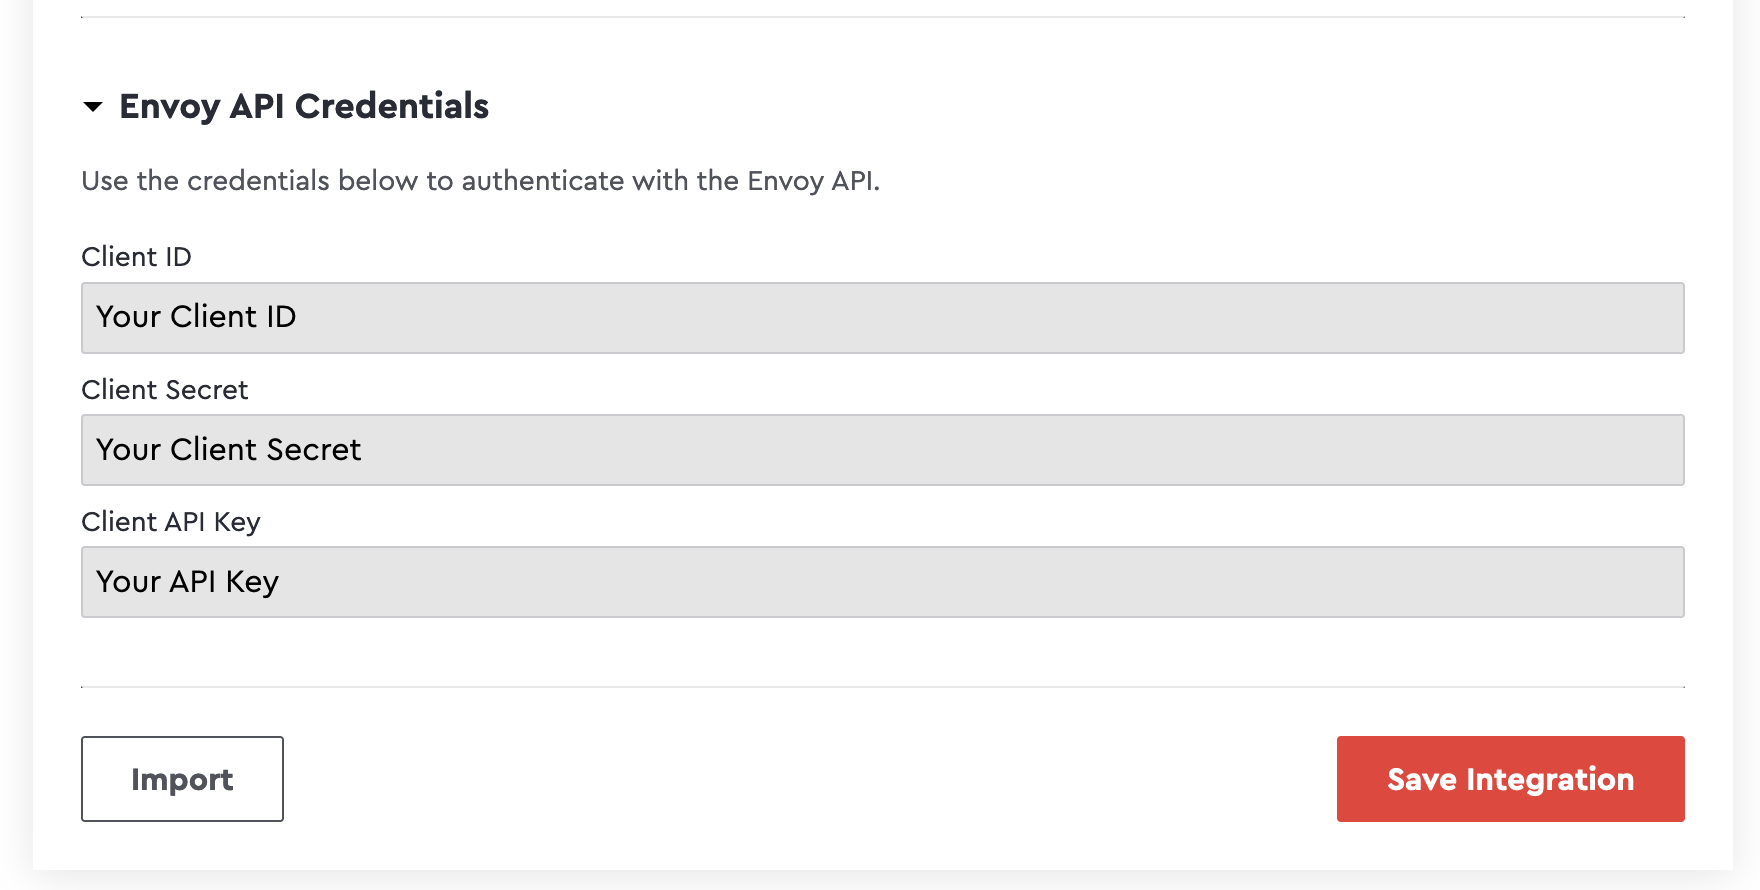
Step 6: Add the key to Serval
- In Serval, navigate to Applications → Connect new → Envoy → Connect
-
Enter the following information:
- Click Submit to complete the integration
Your Envoy integration is now connected! You can start creating workflows to automate visitor management and workplace operations.
Troubleshooting
Healthcheck failure
Healthcheck failure
- Verify your API key is properly copied and pasted with no other characters
- Ensure you have granted proper permissions for healthchecks:
locations.readandcompanies.read